Submitting to Five Safes TES
Researchers interact with Five Safes TES (5S-TES) using the submission layer. The submission layer ensures two of the Five Safes: Safe People and Safe Projects. This means you have to become a user, and be added to a project. The submission layer has an HTTP API which accepts TES messages. For convenience a web application and Python client library have been provided.
Background
Projects
5s-TES users do not interact directly with Trusted Research Environments (TREs). Instead, data access in TREs is scoped by a project, which has a defined time for which it is valid, and defined data users can access through it. This means that you have to request, and be approved for, permission to make submissions to a project.
Submissions
A submission means sending a Five safes TES message to the submission layer. The submission layer then uses tags to assign the task to a project and which TREs should run it.
Authentication
If you are making submissions to 5s-TES using the web application, those interactions are authenticated when you log in. If you are making submissions programmatically, you will have to authenticate your requests using an API token. To get an access token, select "API access token" in the top ribbon of the Submission layer web application and copy it to your clipboard.
Tokens expire. The time and date at which your current token expires are shown above the token
Preparing for a submission
Are you a Submission layer user?
If you are not already a user, an administrator will have to add a new researcher
Are you assigned to a project?
If not, you cannot make submissions. An administrator will have to add you to a project
(Optional) Do you have an access key?
If you aren't submitting through the web application, you'll need to get your access key as described above
Methods
Once you have access to the submission layer, you can make submissions through the HTTP API. To make submissions easier, a python library (the Workbench) and a web application are provided.
Workbench
Five Safes TES workbench is a python library of tools designed to make interacting with Five Safes TES simpler and easier, available on Github and PyPi. Its main functions are to assist with creation and submission of TES messages, as well as retrieval of results.
The typical workflow consists of four steps:
- Validate: Provide your infrastructure configuration and credentials.
- Build: Choose a task template and supply your analysis parameters.
- Submit: Send the task to the TES endpoint.
- Fetch Results: Fetch output files from MinIO storage once the task completes.
There are several ways to pass the configuration and authorisation information to workbench. Information can be passed in directly, or it can be put into a config.yml file. The file is the recommended method, as it means that the file can be reused, rather than copying the information in every time. We also recommend using keycloak credentials over the token, where possible as tokens have a short lifetime.
There is a Jupyter notebook demonstrating the workbench's main functions.
# ----- Five Safes TES Workbench — Example Configuration ------

config:

 # ---- Required Configuration ----

 project: "your-project-name"
 tes_base_url: "http://your-5s-tes endpoint:5034"
 minio_sts_endpoint: "http://your-minio-endpoint:9000/sts"
 minio_endpoint: "your-minio-endpoint:9000"
 minio_output_bucket: "your-output-bucket-name"
 tres:
   - "Your-TRE1"
   - "Add more TREs as needed"


auth:
 # ---- Option 1: Access Token ----
 # (Use Access Token if you have one from the Submission UI.)

 access_token: "your-access-token-here"

 # ---- Option 2: Keycloak Credentials ----
 # (Use Keycloak credentials if you want the Workbench to obtain an access token on your behalf.)

 client_id: "your-keycloak-client-id"
 client_secret: "your-keycloak-client-secret"
 username: "your-keycloak-username"
 password: "your-keycloak-password"
 keycloak_url: "http://localhost:your-keycloak-port/"
Web application
As each submission is associated with a project, you make your submissions in the web application by first navigating to the projects view.
 In the projects view, you can then select a project you are assigned to.
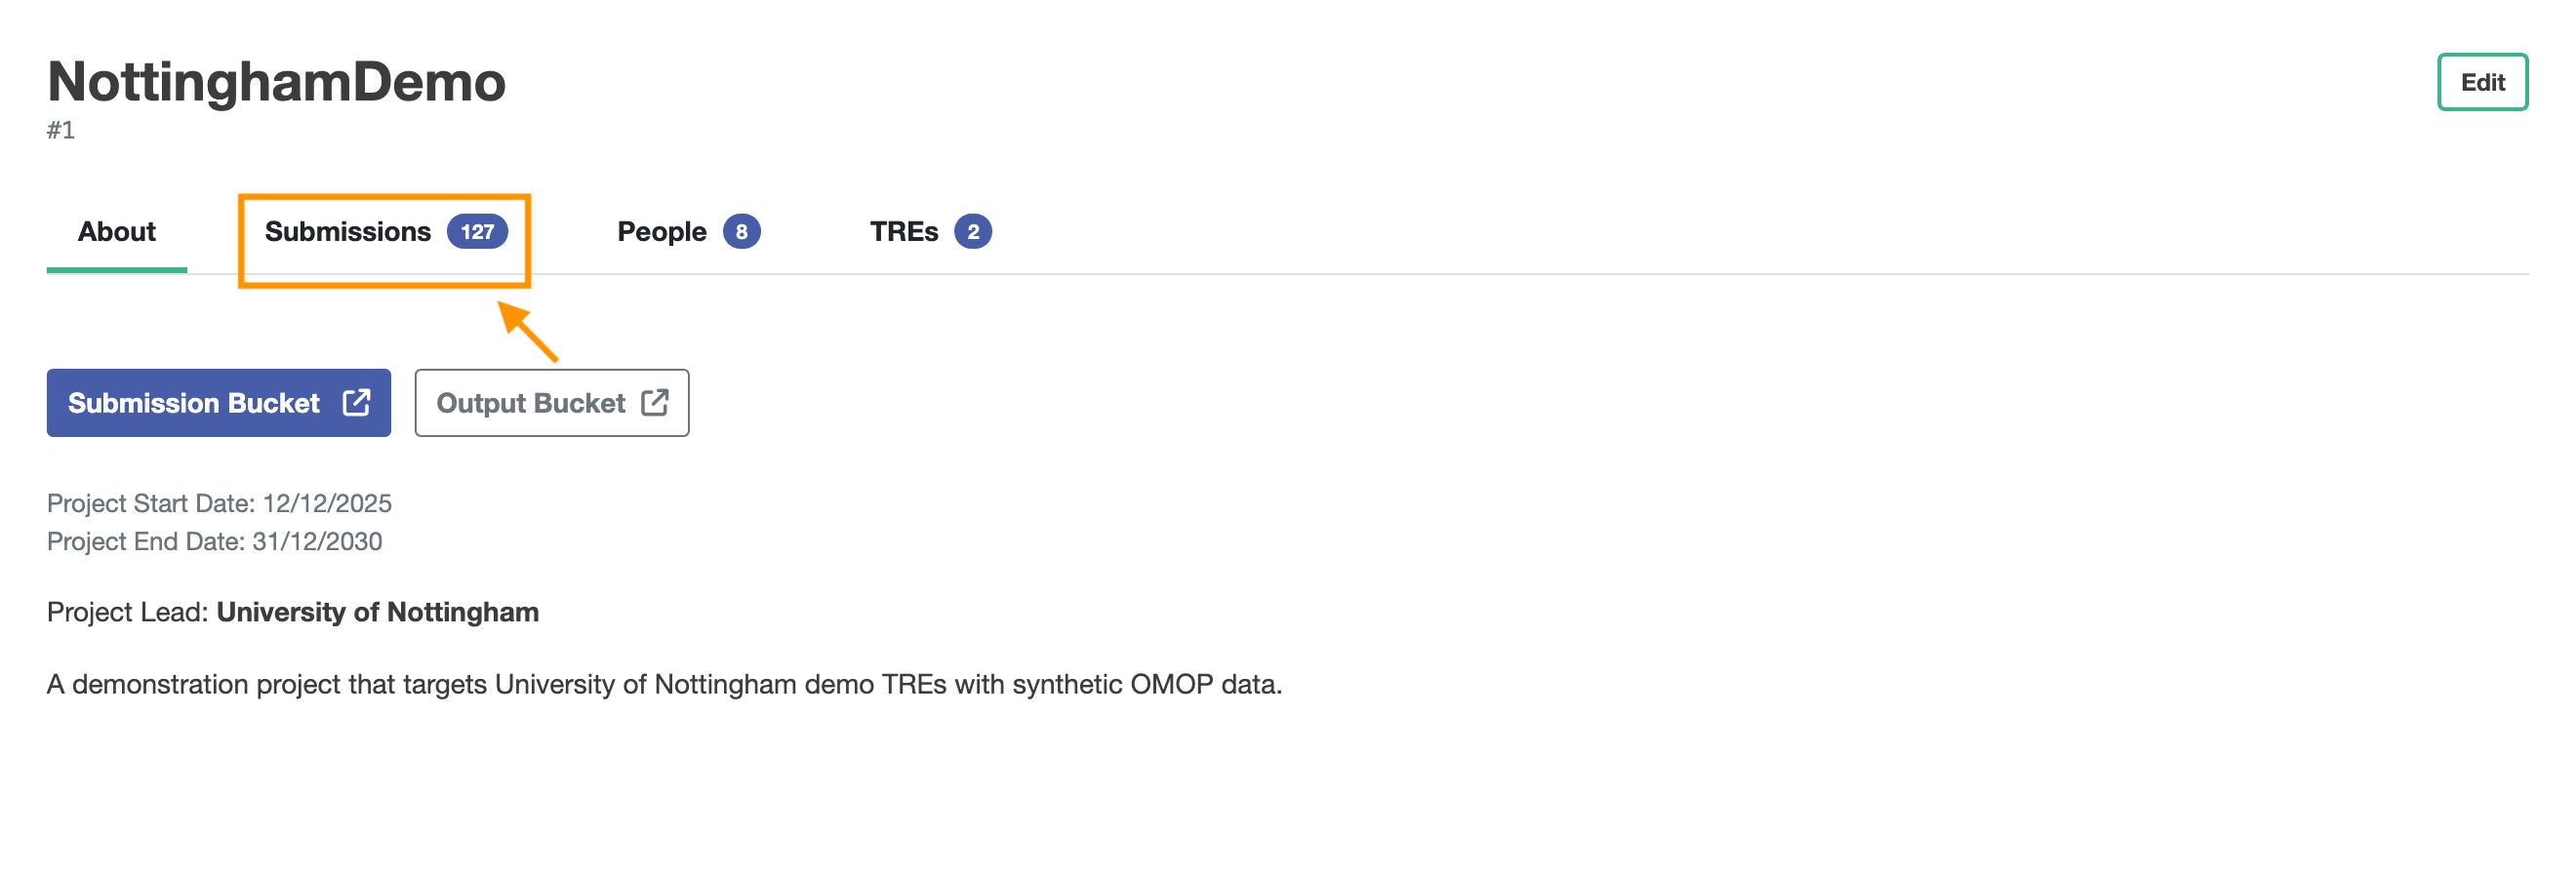
When you are in the project, you can select the Submissions view.
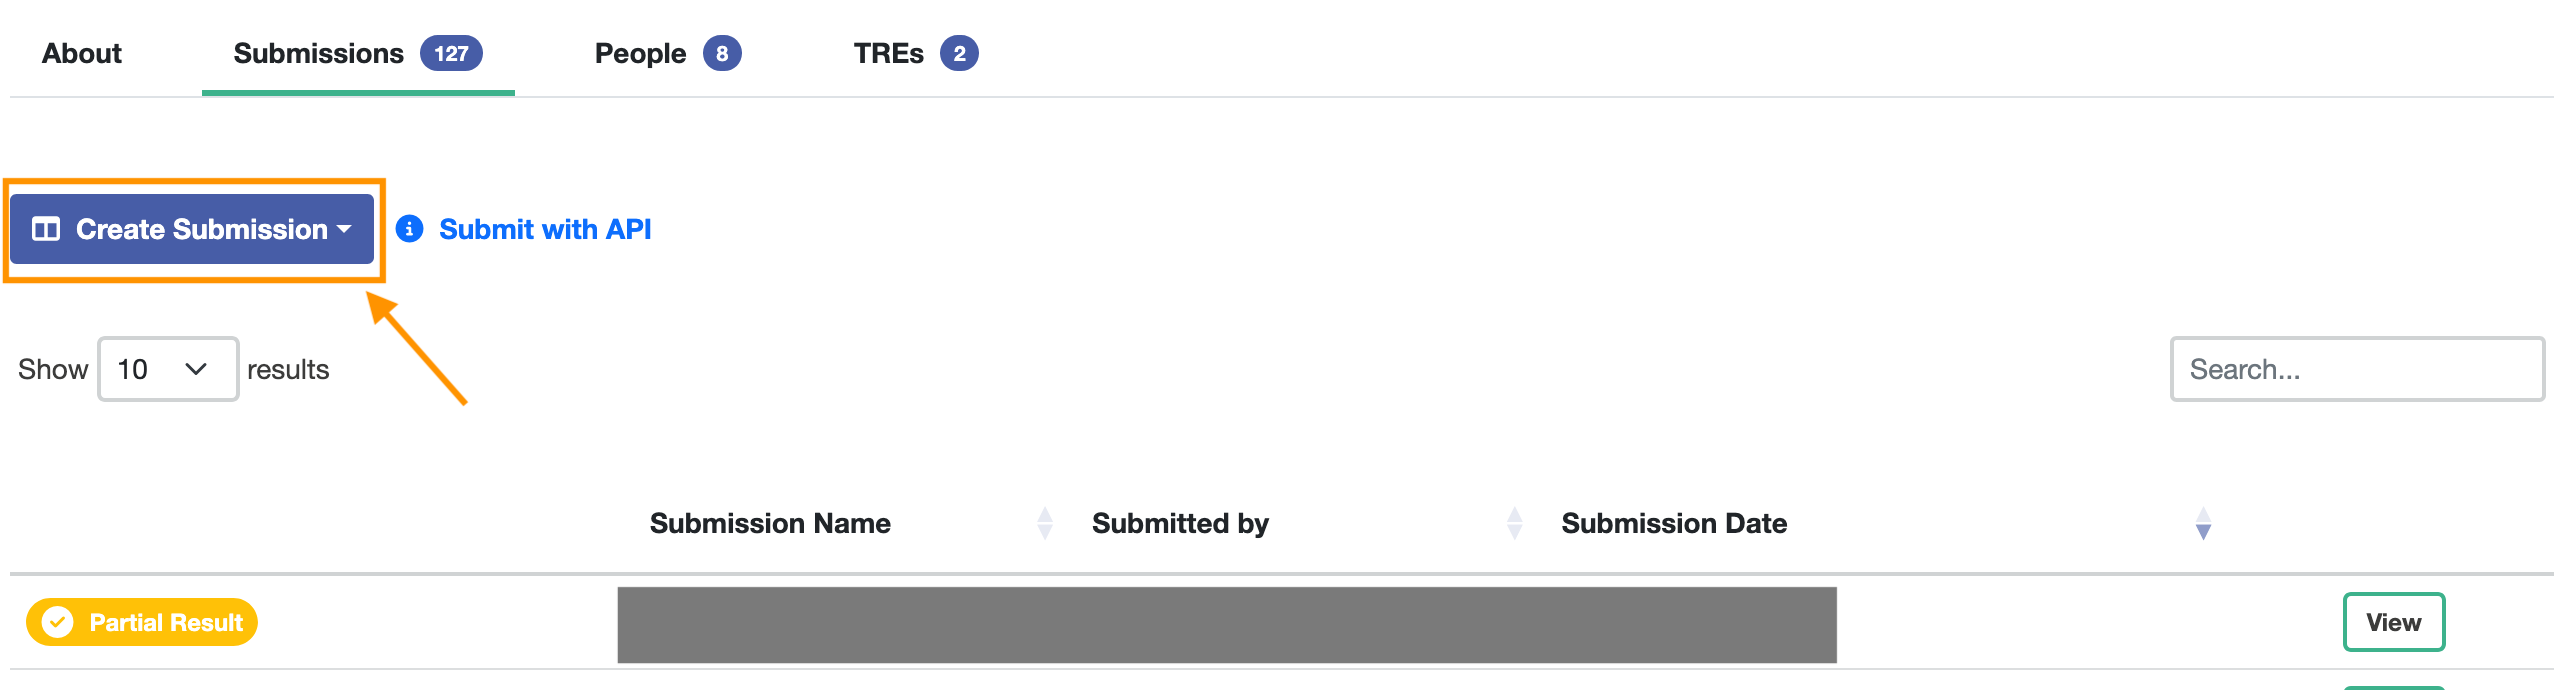
In the Submissions view, you will be shown a button to make a new submission. Clicking the Create Submission button will give you the options
- TES wizard
- GraphQL TES wizard
Submission layer wizards
When making a submission using the submission layer web application, you can use the TES wizard.
There are three options:
- Simple SQL Query: Executes a default SQL container. Just provide a SQL Query.
- Custom Image: Provide details for another image to run, along with commands and environment variables.
- Raw JSON: Write a TES message for more complex requirements.
Raw JSON The Raw JSON wizard has the simplest interface: a single text box for writing a TES message. This includes syntax highlighting and formatting.
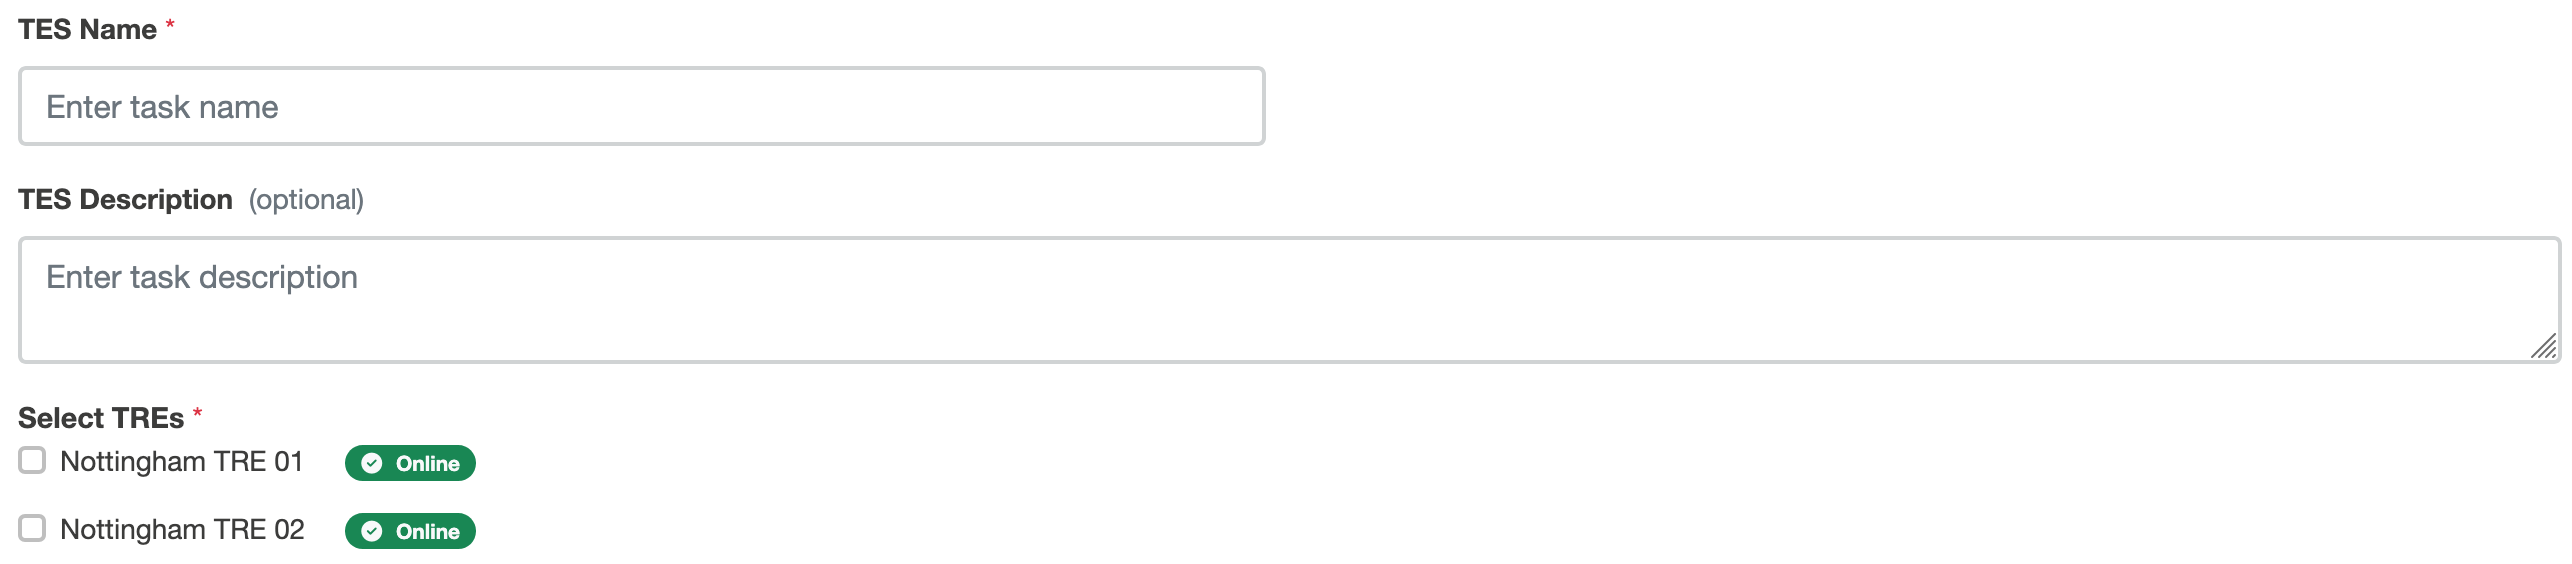
Common features The other wizards have some options in common.
| Field name | Required? | |
|---|---|---|
| TES Name | ✅ | A text box that populates the name field of a TES message, and should be a name that you can recognise, as it is used in the web application as a label for this task. |
| TES description | A text box for an optional longer description of the TES message, which populates the description field of a TES message. |
|
| Select TREs | ✅ | Checkboxes showing the TREs available to run tasks on this project. This part of the user interface also shows which of these TREs are online. |
Simple SQL Query
The Simple SQL Query wizard has a single additional element: a text box for writing a SQL query.
Custom image
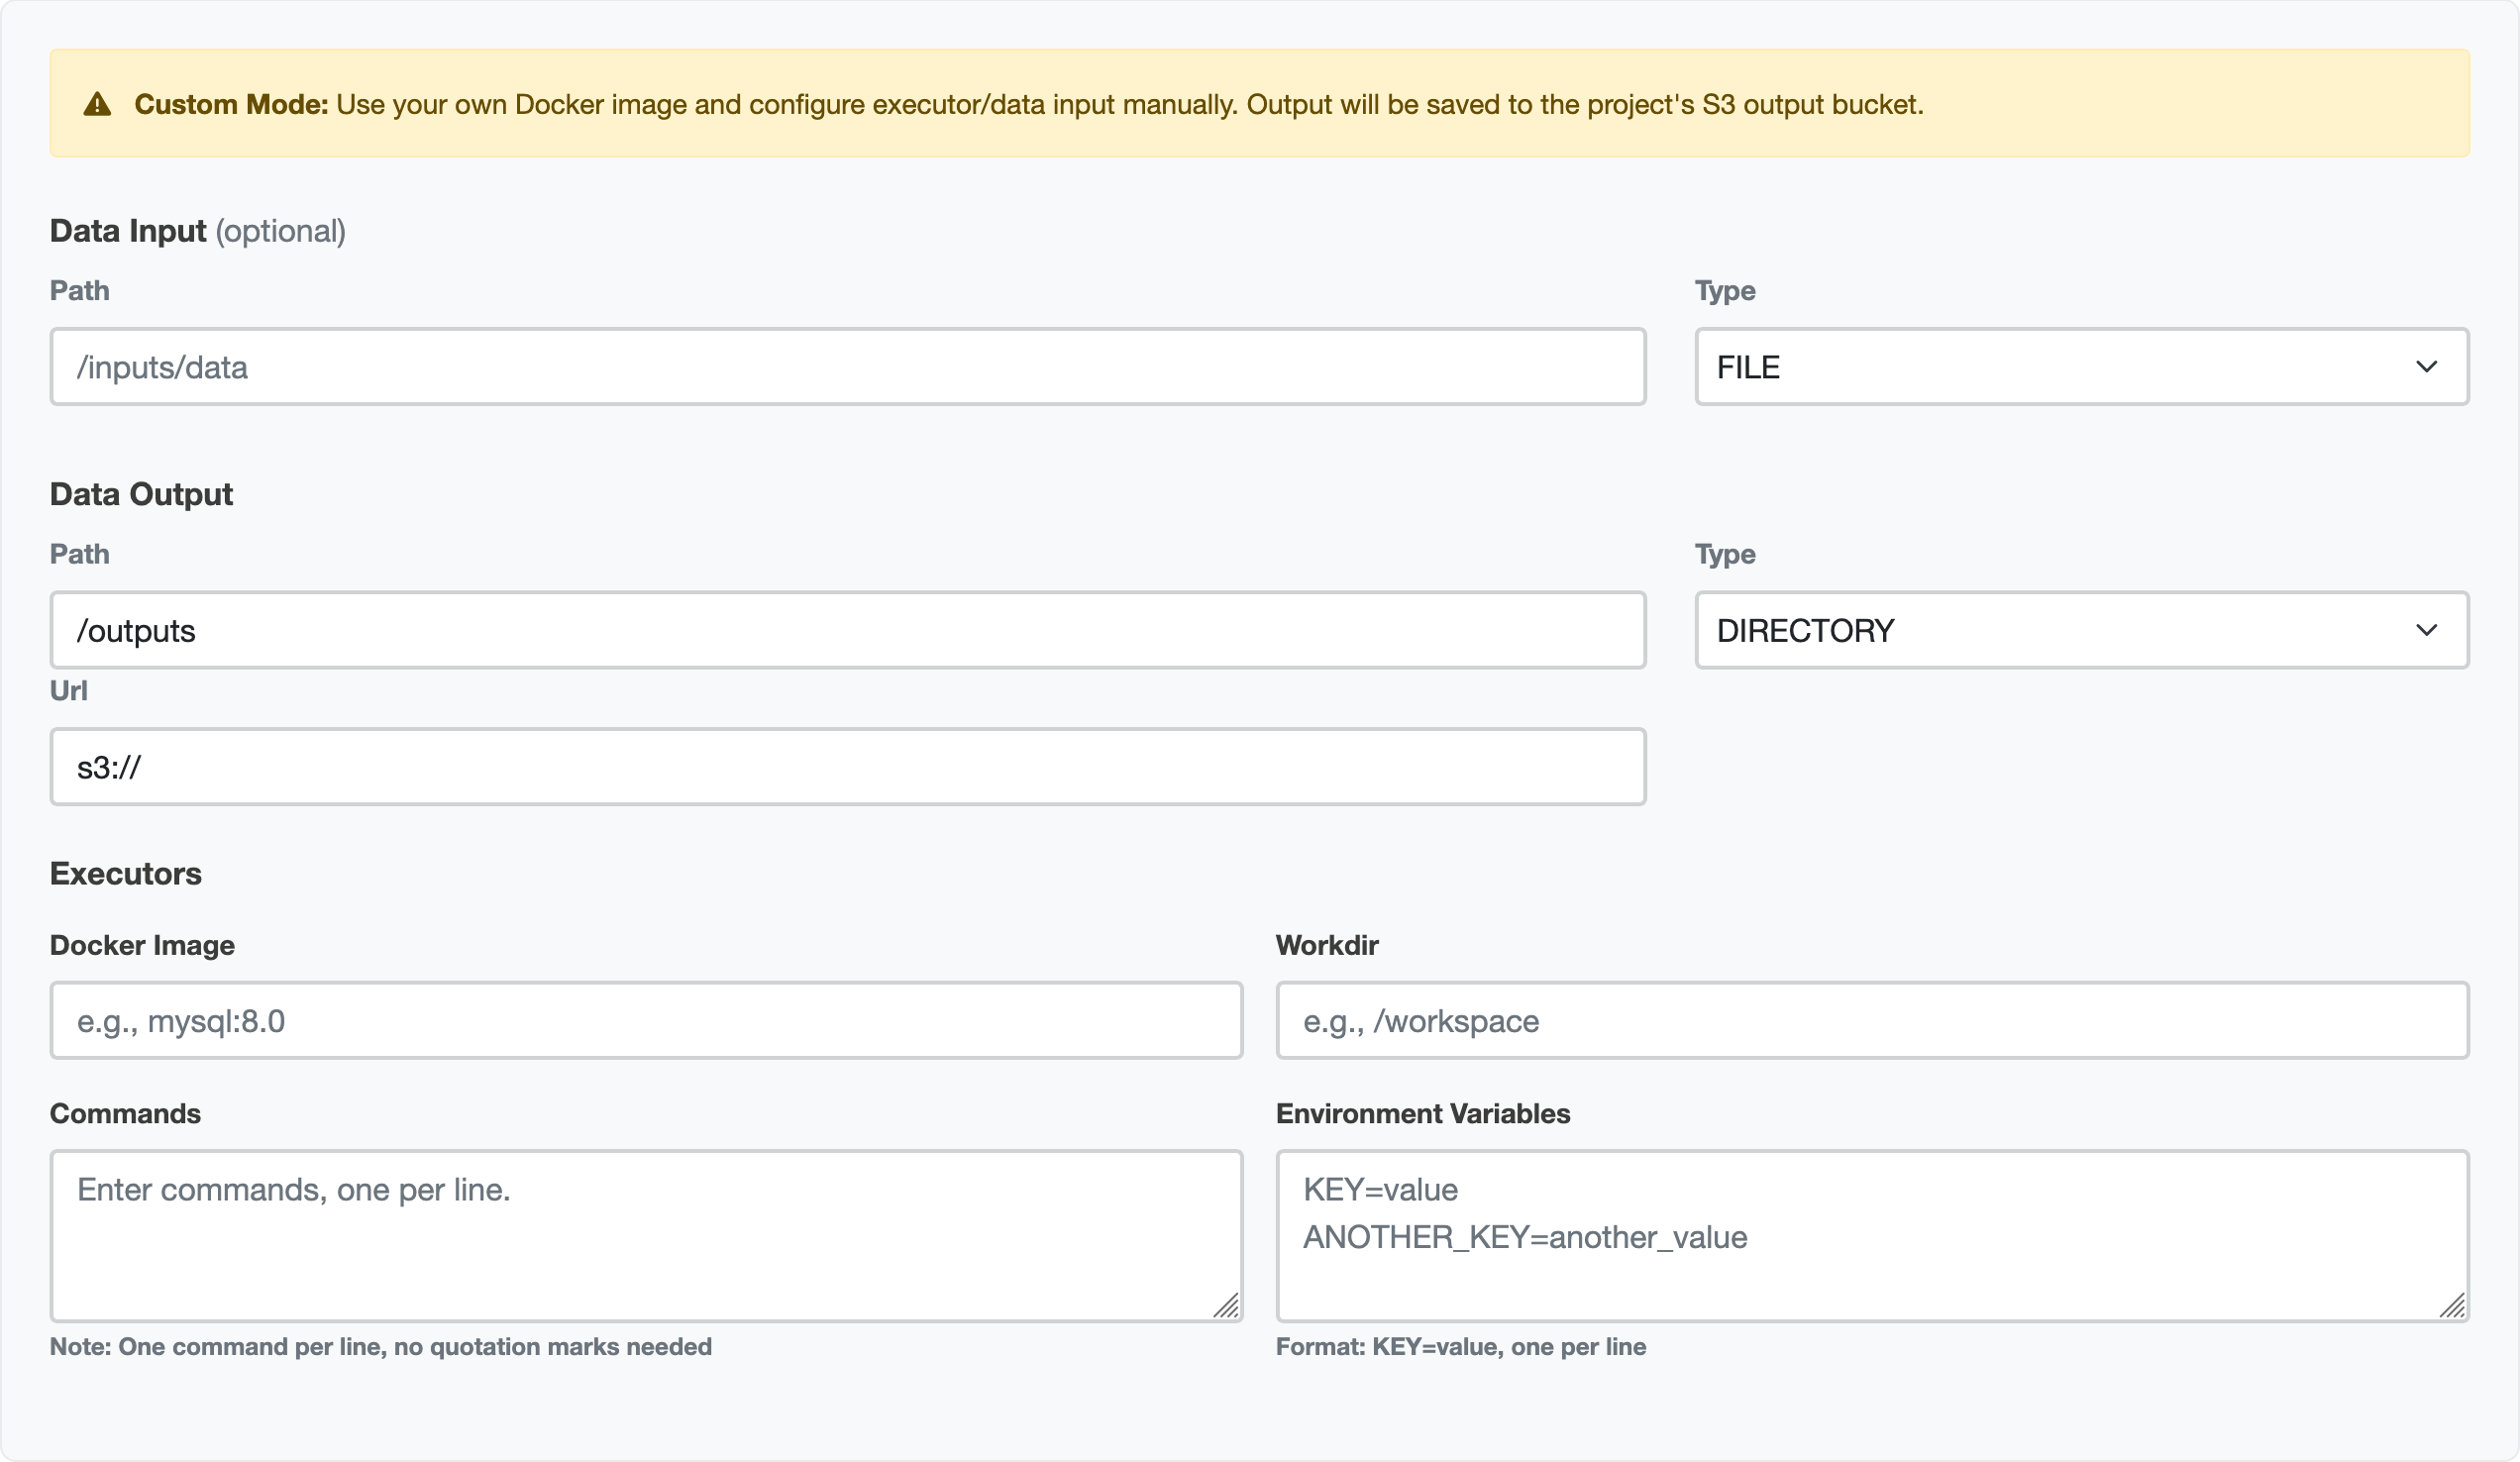
The custom image wizard provides several more options for running tasks.
Data input
If the TREs support it, you can provide a path to download extra data for input.
- Path: a textbox to provide the path from which to collect data
- Type: a selection box where you can choose whether your input is a
FILEorDIRECTORY.
Data output
You can specify where your output is stored. The TRE agent will amend this to comply with egress policy.
- Path: a textbox to provide the path to which output data should be sent
- Type: a selection box where you can choose whether your output is a
FILEorDIRECTORY. - URL: A text box to specify a URL for storing your data.
Executors
This section contains details of your executor(s).
- Docker image: Executors are containers. This textbox allows you to specify which.
- Workdir: The working directory used by this container.
- Commands: A textbox for the commands to pass to the container
The commands that you pass here need to be separated by a new line where normally they would be separated by a space on the command-line. e.g:
--body-json
{"code":"GENERIC","analysis":"DISTRIBUTION","uuid":"123","collection":"test","owner":"me"}
--no-encode
becomes
--body-json
{"code":"GENERIC","analysis":"DISTRIBUTION","uuid":"123","collection":"test","owner":"me"}
--no-encode
- Environment variables: Some containers will need some environment variables to be passed to them to work. You do not need to specify all of these; for example for many TREs, you will not have database credentials and these will be populated for you.
Submit task
For all the wizards, there is a button at the bottom to submit your task.

Once this is pressed, the task is sent to the submission layer. This area will then display your task's progress as it is sent to the TRE agent, then to the TES engine, and when the outputs are being reviewed.
When this is complete, you can collect your results.